

systemd service on Linux, a Windows service on Windows) that runs on your machines, handling the deployment lifecycle of configurations. For more information on the agent, visit the Miru Agent documentation.
Supported platforms
The Miru Agent supports Linux and Windows. macOS is not supported.- Linux
- Windows
The following operating systems are tested and verified to work with the Miru Agent:
- Ubuntu 20.04, 22.04, and 24.04 LTS
- NVIDIA Jetson JetPack 5.1 and JetPack 6.1
- Raspberry Pi OS (64-bit)
Create a device
Navigate to the Devices page.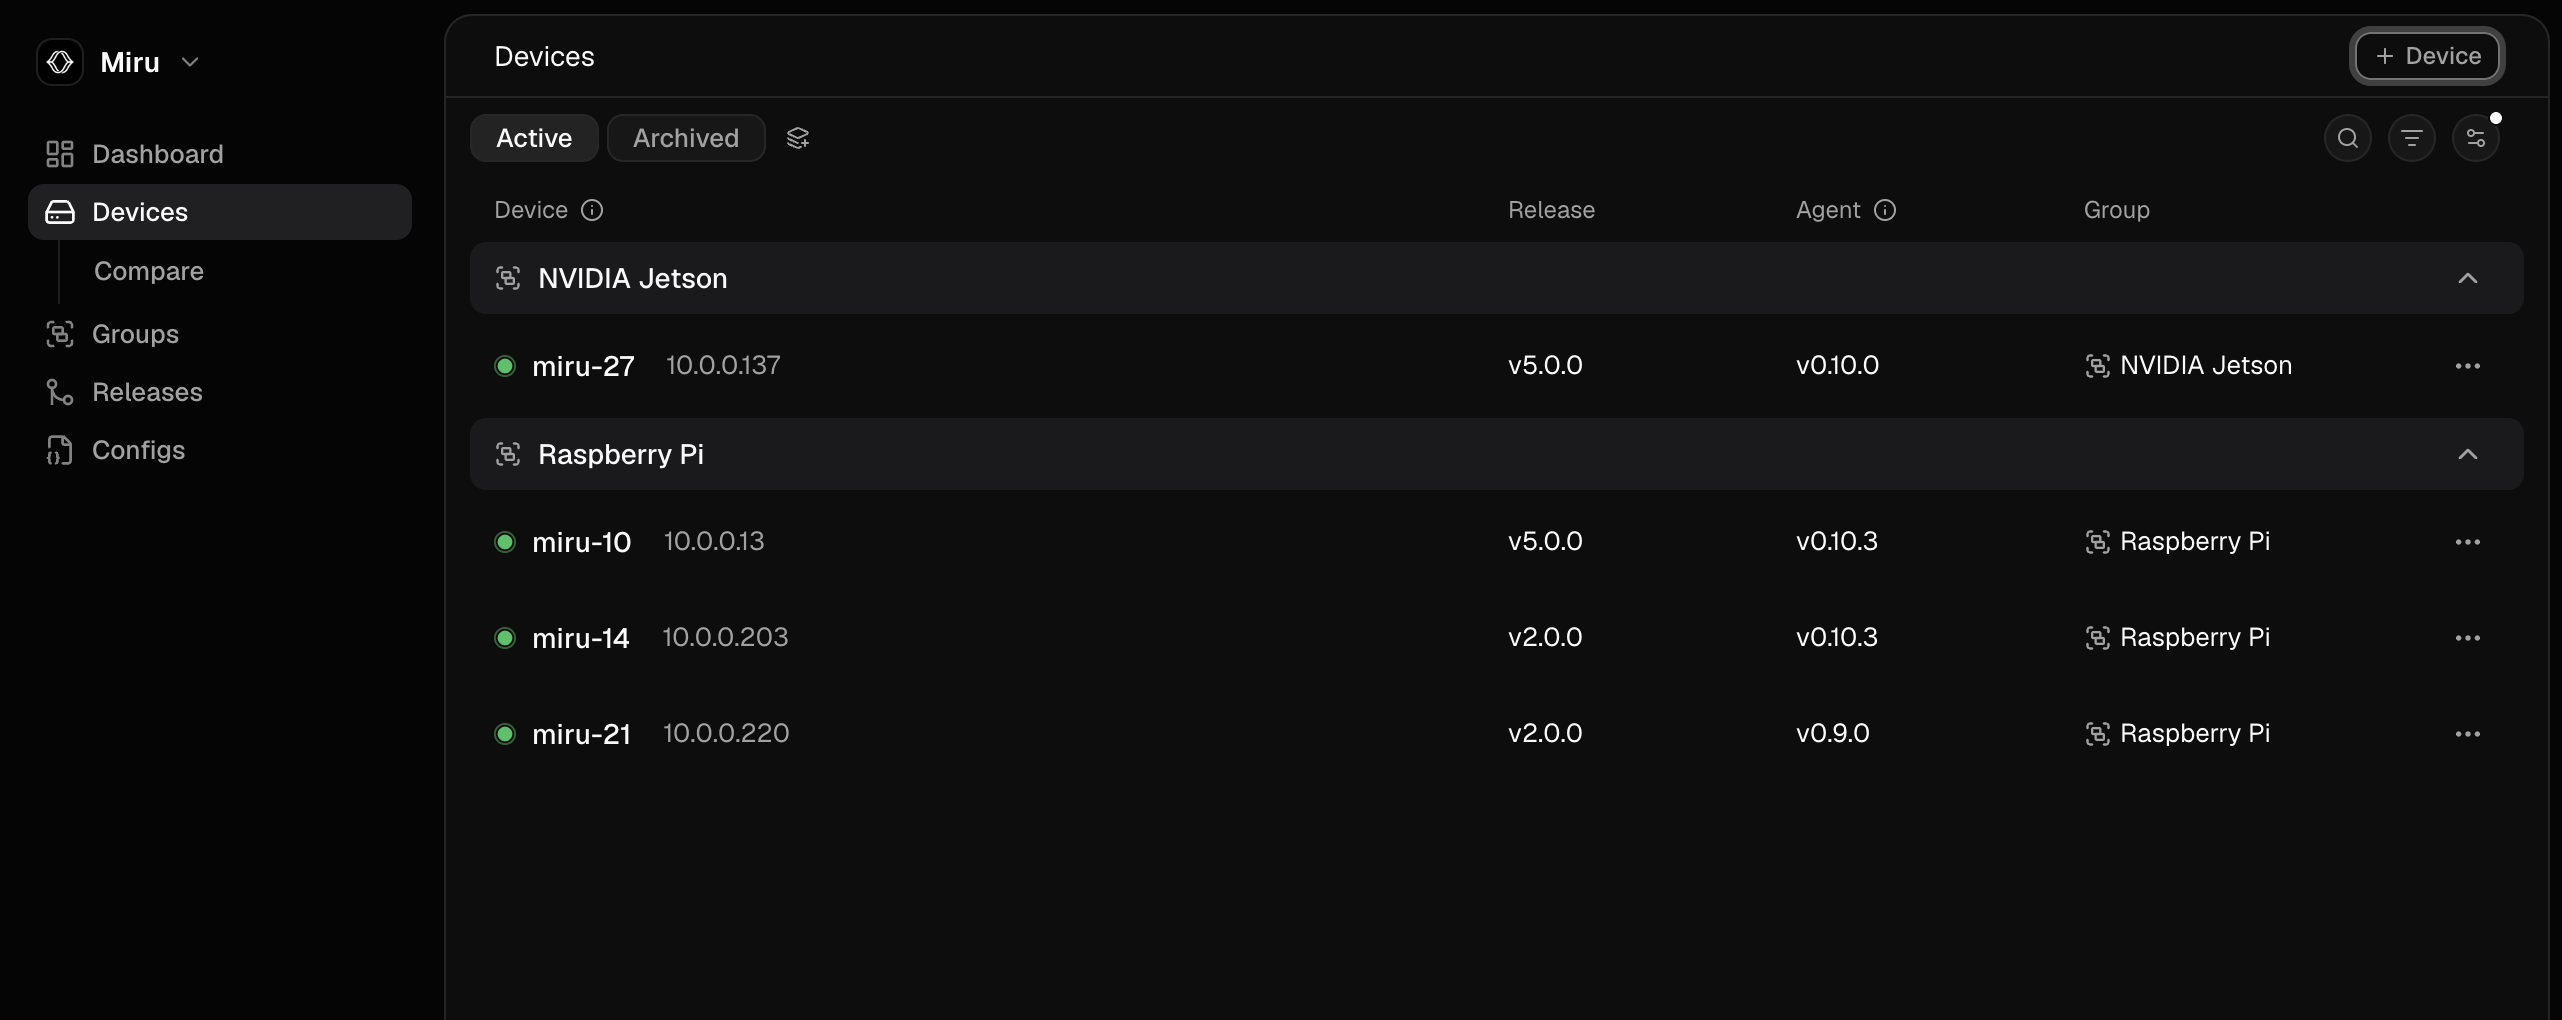
Install the miru-agent package
Next, we need to install the miru-agent package on your target machine.
Click the Provision button on the device you just created.

- Linux
- Windows
Follow the instructions to set up Miru’s apt repository and install the 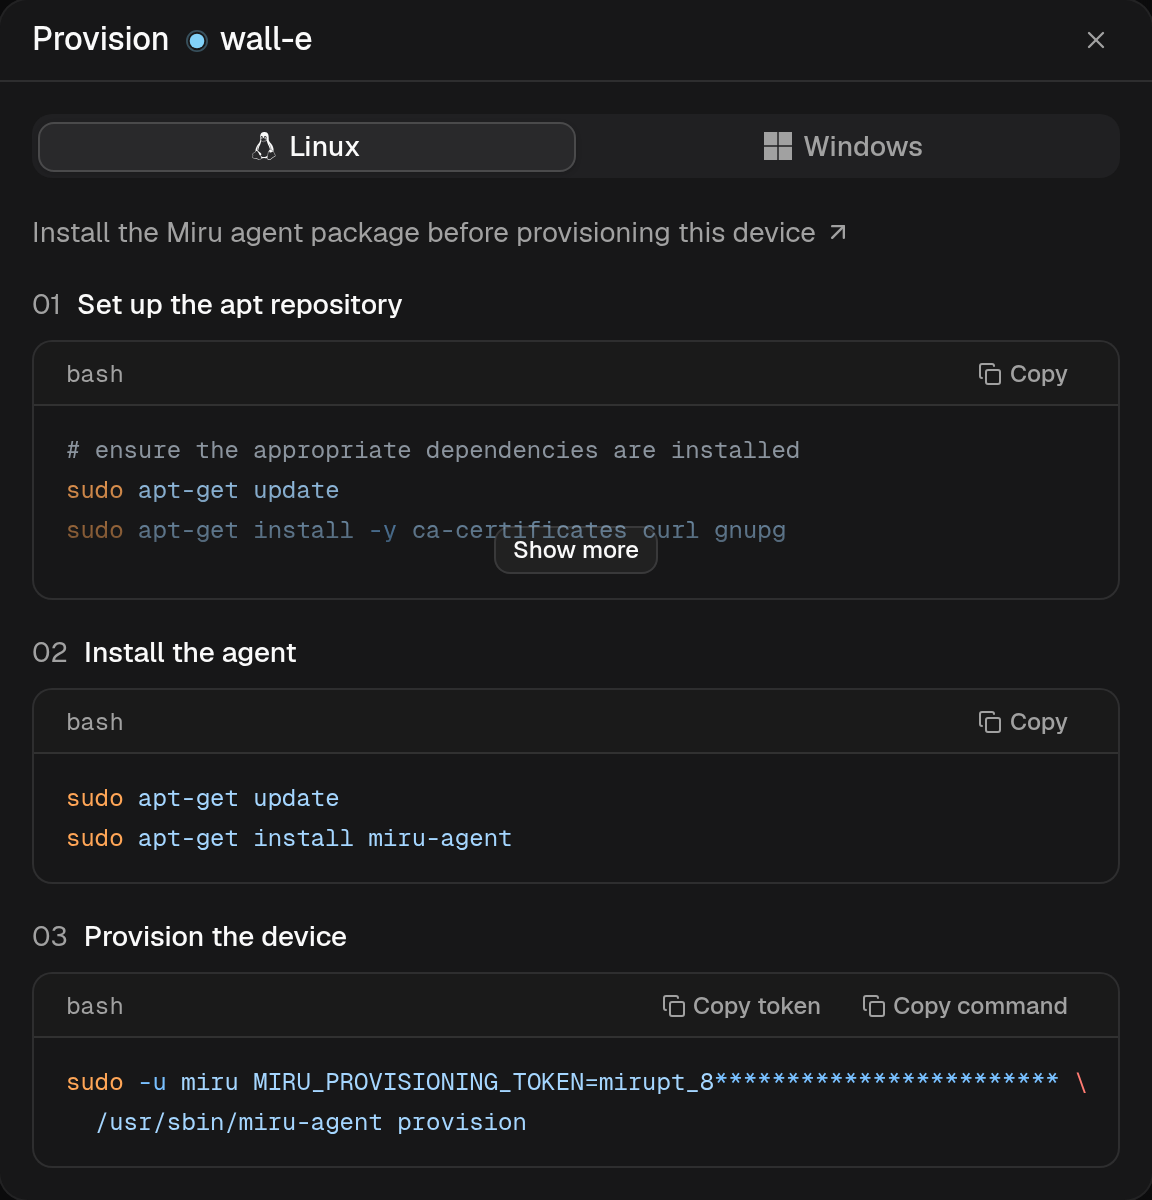
miru-agent package. If you’ve already installed the Miru Agent, you can skip these steps.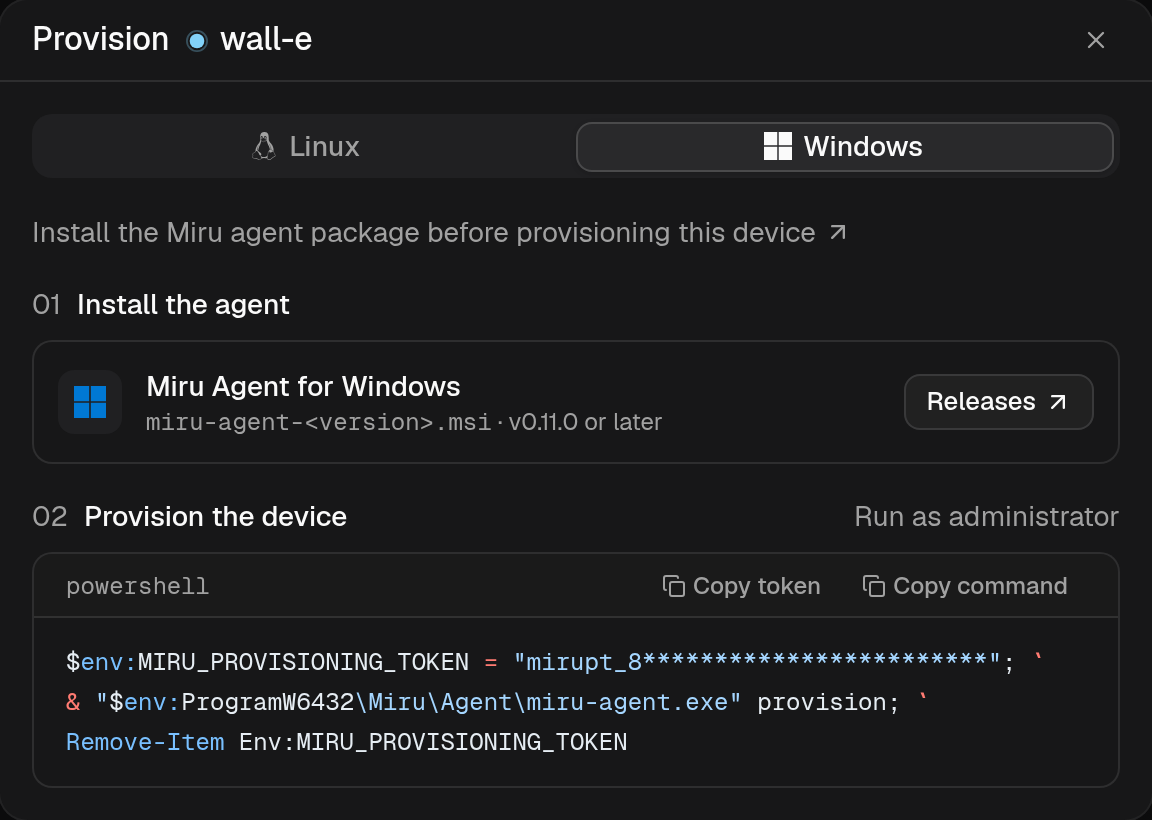
Provision the device
Once themiru-agent package is installed, run the provisioning command from the same dialog.
The dialog’s provisioning step presents a pre-authenticated command that invokes the miru-agent binary with a short-lived token (5 minutes) to provision the device for your workspace.
- Linux
- Windows
The command can be broken into the following components:
sudo -u mirusets the command to run as themiruuser.MIRU_PROVISIONING_TOKEN=<token>authenticates the request./usr/sbin/miru-agent provisionexecutes themiru-agentbinary with theprovisioncommand.
Verify the installation
To verify the Miru Agent was successfully installed and provisioned in Miru, navigate to the Devices page. You should see the device listed with the statusActivating before transitioning to Online.
The transition from
Activating to Online may take up to 10 seconds, depending on your network connection.